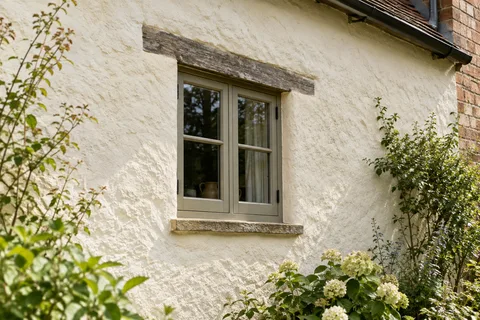
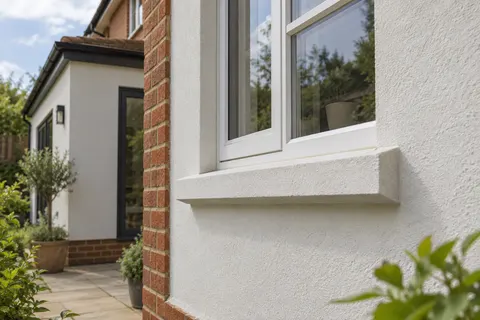
Exterior rendering
Render Repairs in Beeston | Cracks, Patches and Edges
A useful repair starts with a clear description of the damage. Record where it is, what surrounds it and whether it appears to change. The repair method then needs to address the cause and the existing materials. Filling a visible line without understanding the wall can leave the same problem waiting beneath a fresh surface.

On this page
Describe observations without guessing the diagnosis
Photograph the damaged area from close range and from far enough away to show its position on the building. Note nearby windows, roof junctions, pipes and changes in construction. If you have dated photographs showing a change, retain them. Describe a crack as a crack until it has been assessed; its shape alone is not enough for an owner to decide whether the cause is structural movement, a material junction or a local finish defect.
Loose edges, staining and hollow-sounding areas are also useful observations, but they need appropriate inspection. Avoid knocking or pulling at material at height. The survey should determine what can be safely examined and whether further investigation is required. A photograph is helpful preparation for that visit, not a substitute for access to the relevant parts of the wall.
Include the date of each observation so a later inspection can compare the same location meaningfully.
- Map the damage Tapping finds hollow areas; cracks and their likely cause are noted.
- Cut back Failed render is cut out to a sound edge, usually squared off.
- Fix the cause Leaking gutters, sills without drips or render below the DPC are dealt with.
- Rebuild in coats Using a material compatible with the surrounding render and masonry.
- Blend the finish Texture is matched; colour may need a coating over the wider area.
The usual order of work. The survey and the chosen products decide the actual steps.
Find the boundary of sound work
The visible damaged patch may be smaller than the area requiring repair. Conversely, a local defect does not automatically justify stripping the whole elevation. The assessment should identify the condition of the surrounding covering and a suitable repair boundary. That boundary has to support the proposed work and make sense visually, especially where the wall is a large uninterrupted plane.
Ask the quotation to distinguish removal of unsound material, repair of the background and reinstatement of the render system. Those are separate operations. If more extensive deterioration is found after opening up, there should be a defined review and authorisation process. A vague instruction to patch as necessary leaves both the extent and the final appearance unclear.
Match materials before trying to match colour
Identify the existing render where possible, using reliable installation records or a competent assessment. A traditional lime covering, a mineral render and a modern base-coat system can require different repair approaches. The replacement should suit the retained materials and the background. A colour match does not make an incompatible patch appropriate.
For older fabric, lime rendering guidance may be relevant to the repair specification. For a modern silicone system, establish the original layers and the manufacturer’s requirements. Where the material cannot be identified confidently, record that uncertainty and obtain suitable advice. Do not present a guessed product name as an established fact merely to complete the quotation.
Deal with the detail that caused the damage
A patch beside a leaking pipe may need rainwater work as well as render repair. Damage around a replacement window may relate to the altered opening and its edges. A crack at an extension connection may require a designed joint rather than a rigid patch. These situations should be assessed individually; the repair specification should state which associated work is included and which belongs to another trade.
If a fitting is removed to expose the repair area, agree how it will be reinstated. New fixings, holes and sealant should not be improvised after the finish has cured. Keep the sequence clear so the repaired surface is not immediately damaged by the next operation. Where replacement of a larger wall is the appropriate outcome, the wall rendering guide covers its boundaries and details.
| Record | Purpose |
|---|---|
| Location and dated photographs | Identify the same defect on later visits |
| Existing material and uncertainty | Select a compatible repair approach |
| Extent of unsound work | Define what must be removed |
| Associated cause or detail | Coordinate work beyond the surface patch |
| Sample and finish expectation | Agree how the repaired area may appear |
Be realistic about a patch on an aged wall
The surrounding render has weathered, collected dirt and perhaps received several coats of paint. A new patch may differ even when the original colour reference is available. Texture, aggregate and finishing technique also affect the result. Use a sample or trial where appearance is important and agree whether the objective is a close local match or a later treatment of a larger defined area.
A colour change can sometimes form part of the final decorative plan, subject to the condition and compatibility of the retained covering. It should follow the repairs, not conceal incomplete work. The render respray page explains the assessment needed before coating an existing surface. A uniform colour cannot correct a patch whose shape, texture or adhesion is unsuitable.
Keep a record for the next inspection
Save the final repair locations, materials and dates alongside photographs. If the original concern involved a changing crack or recurring wetting, agree what further observation or specialist advice is appropriate. Do not treat the disappearance of the mark under fresh material as proof that every underlying issue has been resolved.
At handover, review the repaired edges and any reinstated fittings while access remains available. Record outstanding items precisely rather than using a general note that the wall needs finishing. Useful records make a future repair easier to specify and can reveal whether a new defect is genuinely new or lies beside an earlier intervention. They should remain factual rather than becoming an unsupported guarantee of future performance.
Give each repair a location that another person can find, such as the left corner of the rear kitchen window. Pair a close photograph with a wider view showing that opening. A folder of numbered close-ups is much less useful if nobody can identify which part of the house they show.
Common questions
Can every crack be filled?
No. The cause, movement and surrounding condition determine the response. Some defects require investigation or a designed detail before any surface repair is appropriate.
Will a patch disappear completely?
An invisible match should not be promised on an aged finish. Compare texture and colour using a trial and agree the realistic visual objective.
Do small repairs still need access planning?
Yes. Their position may require competent access arrangements even when the repair area is modest.
Should I repaint before the repair survey?
It is generally more useful to let the assessor see and record the defect first. A new decorative layer can conceal observations needed to understand the existing condition.
See housing and planning information for Beeston and nearby places, including the source and geography behind each figure.