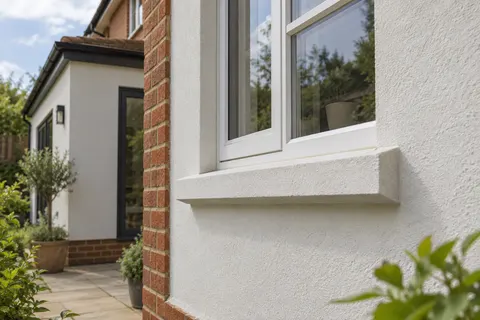
Exterior rendering
External Wall Insulation in Beeston | Planning the Details
External wall insulation adds a designed layer outside the existing wall and normally includes a specified exterior finish. It changes the wall’s dimensions as well as its appearance. The assessment therefore needs to cover the building and its interfaces, not simply the visible square metres that will receive insulation.

On this page
Start with the building and the intended improvement
Establish the construction, condition and relevant existing alterations before selecting a system. The proposed thermal improvement should be assessed by suitably competent people, with the applicable requirements considered for the actual project. This page does not provide a predicted saving or a standard insulation thickness because those depend on information that has not been established for your property.
Record moisture concerns, defective rainwater details and areas of damaged render so they can be investigated before being covered. Insulation should not be used to hide a problem that needs repair. If the building includes traditional fabric, the moisture and material implications need particular care within the design. A modern decorative finish does not establish that the complete wall build-up is suitable.
- Existing wall Prepared; fittings removed and the base track fixed above ground level.
- Insulation boards Bonded with adhesive and, in most systems, mechanically fixed to the wall.
- Basecoat with mesh Reinforcement mesh embedded across the board joints and around openings.
- Primer Where the system requires it.
- Finish render A thin-coat finish that weatherproofs the insulation.
Wall on the left, finish on the right. Not to scale: coats, thicknesses and primers follow the chosen manufacturer’s system and the condition of the wall.
Draw the new outer line of the wall
The added build-up changes the relationship with windows, doors, roof edges and adjoining structures. Ask for the important sections or details that show those connections. A sill needs to work with the finished wall, not only with the old face. A narrow passage or boundary position may also require attention when the external line moves.
At an extension junction, establish how the insulation meets a wall that may have different construction or already meet a different specification. A continuous colour can conceal that change visually, but the technical transition still needs a design. Where only part of the house is being upgraded, identify the termination and any implications of the partial scheme rather than treating it as an ordinary colour boundary.
List everything fixed to or passing through the wall
Downpipes, vents, cables, taps, lights and signs all need consideration. Some may need temporary removal, relocation or purpose-designed attachments. Their function must be maintained through an agreed sequence. Photograph them at the survey and identify the responsible trade. A rendering contractor should not be expected to make an undocumented decision about a service simply because it is in the way.
Rainwater fittings deserve particular attention because their positions and brackets relate to the new wall thickness. Coordinate the pipe route, stand-off and fixing details before the final finish. The same applies to access for maintenance: a pipe that can be fitted neatly today should still be reachable for future work. Keep penetrations and attachments within the supported system design.
Meter-box doors and service access covers need more than a marked position on an elevation. Check how they will open and remain accessible beside the thicker finished wall. Any necessary alteration should be agreed with the responsible specialist or service owner before the surrounding insulation is installed.
Choose the finish within the insulation system
A silicone finish may form part of an EWI system, but the decorative coat does not define the whole installation. The insulation, fixings, base layers, reinforcement, edges and final coat must work together as specified. Ask for the complete named system and relevant design information rather than a list of components selected independently for convenience.
Appearance still matters. Use samples to compare grain and colour beside retained brick or neighbouring elevations. However, do not let the preferred texture dictate an unsupported build-up. The silicone rendering guide explains the visible finish in more detail, while house rendering considers how the completed work sits across the whole property.
| Connection | Information to resolve |
|---|---|
| Window and sill | Finished dimensions, reveals and water-shedding detail |
| Roof edge | Relationship with the thicker wall |
| Pipe or cable | Temporary arrangements and final supported fixing |
| Base of wall | Specified termination and adjacent ground conditions |
| Uninsulated return | Designed transition and finish boundary |
Coordinate assessment, permissions and construction
Check the relevant planning and building requirements for the proposed work, including any designation affecting the property. Beeston conservation-area information has specific boundaries and appraisals; it should not be applied to the entire town. Conversely, a property outside a named area still needs its actual project requirements considered. Keep decisions and advice with the design record.
The construction programme should identify when other trades complete their work and when the substrate is ready. Access must allow the required installation and inspection stages. Agree arrangements for entrances, occupants and stored materials before starting. Weather protection and product requirements should be reflected in the sequence rather than added as an informal adjustment after delays occur.
Make the handover useful for future work
Keep the installed system, drawings, product information and relevant maintenance instructions. Record details of hidden attachments and interfaces before they are covered where that forms part of the inspection plan. A later contractor should be able to establish that insulation is present before drilling, fixing or changing a pipe. The wall’s finished appearance cannot provide all that information.
If damage occurs later, seek a repair appropriate to the complete system. A superficial patch may not address affected layers beneath the decorative coat. Similarly, future colour treatment should be checked for compatibility. The render repair and colour-change guides offer starting questions, but work on an insulated system must refer back to its specific construction.
Name the person who holds the final drawings and make sure the property owner receives a usable copy. Future maintenance should not depend on locating an old contractor or interpreting an unlabelled collection of photographs. A concise installed-system summary can sit at the front of the more detailed documents.
Common questions
Is EWI the same as thick render?
No. It is a designed insulation system with a specified exterior finish and associated details. Its thermal, moisture, fixing and interface requirements need proper assessment.
Can existing pipes stay in the same position?
That depends on the new build-up and the supported details. Their function, fixing and maintenance access must be resolved before installation.
Can only the extension be insulated?
A partial scheme needs assessment and designed transitions. It should not be assumed to behave like a simple decorative treatment of one wall.
How should potential energy savings be assessed?
Use an assessment of the actual building, the proposed system and how the home is used. Ask for the heating, occupancy and ventilation assumptions so the estimate can be understood alongside the scope of the work.
See housing and planning information for Beeston and nearby places, including the source and geography behind each figure.