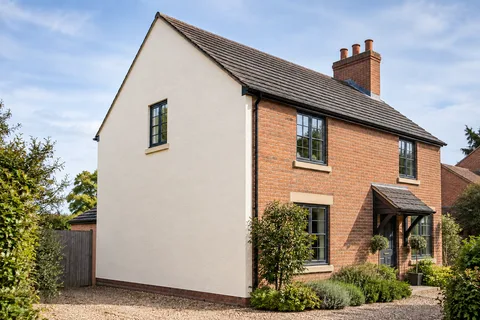
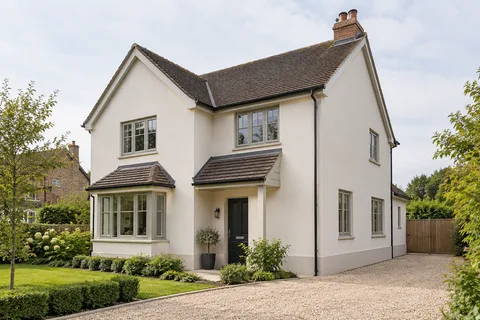
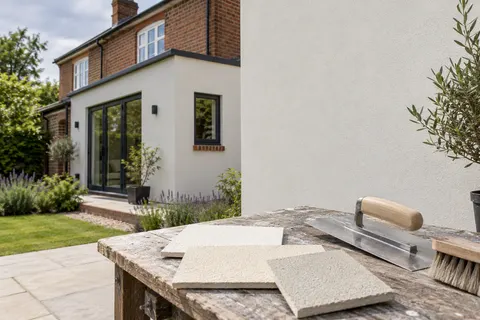
Exterior rendering
Wall Rendering in Beeston | Extensions and Single Elevations
A single wall can be a complete project when its boundaries are properly designed. The challenge is usually where the new work stops: at a neighbouring finish, a roof, an opening or the ground. Decide those lines early, whether you are finishing an extension or renewing one elevation of an existing building.

On this page
Draw the work area, including the awkward returns
Mark the visible face and every return that belongs to it. A side wall may turn into a recessed doorway or continue above a porch. A rear extension may have a narrow strip beside a boundary that is easily missed in a front-facing photograph. These areas affect preparation, access and the finished appearance. They should be identified before the wall is measured for a quotation.
Also mark what stays untouched. That may be a brick band, an existing render panel, a window surround or a neighbouring wall. Ask how each retained area will be protected and what forms the boundary of the new work. A clean drawn line is not automatically a workable physical joint; the detail needs to suit the actual materials and their condition.
For an L-shaped rear wall, give the long face and short return separate labels on the sketch. Use those labels in the quotation and on photographs. This makes it possible to check whether a narrow strip behind a gate, for example, has been included or deliberately left out.
- Set the edges Decide where new render stops against brick, stone or an existing finish.
- Prepare the background Remove loose material, repair masonry and prepare suction and surface key. Existing paint needs a specified removal or alternative treatment.
- Base coat Built up to level the wall, with mesh where backgrounds change or crack.
- Finish Matched to the rest of the house or chosen as a deliberate contrast.
- Shed the water Copings, sills and the base bead keep rain off the top and away from the bottom edge.
The usual order of work. The survey and the chosen products decide the actual steps.
Treat old and new masonry separately at the survey
New blockwork should be assessed for readiness, surface condition and the requirements of the chosen system. Older masonry may carry paint, previous repairs or remnants of several coverings. The fact that both sit on one elevation does not make their preparation the same. Record the difference in the specification so that the finished colour does not conceal an unresolved technical assumption.
Where an extension meets the original building, the connection may need movement provision or another designed separation. Render should not be used to hide a joint that is supposed to function. Ask the designer or system supplier for the relevant detail and include it in the rendering package. If the junction is already cracking, establish the cause before choosing how to finish it.
Make the top and bottom of the wall part of the job
Water should be managed by the building’s details, rather than by expecting the decorative face to compensate for an unsuitable roof edge or missing projection. Review copings, flashings, sills and the lower termination with the proposed build-up in mind. Their relationship can change when an old thick covering is removed or when a new system adds material outside the existing surface.
At ground level, note paths, paving and soil against the wall. The correct termination depends on the building and the specified system; there is no single attractive line that can be copied onto every property. Avoid burying a detail simply to make the colour meet the paving. If levels or drainage need attention, identify that work before the finishing stage.
Choose the texture at the scale of the elevation
A small wall beside a large glazed opening can make a coarse texture quite prominent. A long plain side wall may show changes in preparation or finishing differently. Compare silicone rendering and monocouche using actual samples, and ask how the selected finish will be applied across the available working area. The visual result depends on the background and workmanship as well as the material.
If the surrounding building retains an older finish, decide whether you want a close match or a deliberate distinction. An attempted match should be tested, particularly where the existing surface has weathered or been painted several times. A related colour at a clear corner may be more predictable than trying to conceal a patch in the middle of an ageing elevation.
| Approach | What to agree |
|---|---|
| Close visual match | Texture sample, colour limits and the effect of ageing |
| Related finish | Colour relationship and a clear stopping detail |
| Distinct extension | Material junction and the intended contrast |
Do not confuse a small wall with simple access
An upper wall above a glazed extension can require more planning than a larger clear elevation. Include photographs showing the roof below, the available ground and the route for equipment. A scaffold arrangement needs competent design and assessment. The rendering scope should not assume that a glass roof, porch or neighbouring structure can support access or stored materials.
For a shared passage, establish who uses it and what arrangements are needed while work takes place. Consider doors opening into the route, bins, cycles and services fixed to the wall. Keeping a route usable is a practical design requirement, not a note to add after equipment has been erected. Any necessary permissions should be dealt with before the work is programmed.
Record what happens at the edges after completion
Ask for inspection photographs of details that will become difficult to see once access equipment is removed. Keep the chosen system and colour reference with a marked image of the finished extent. If another elevation is completed later, that information will help the next specification without assuming that the same preparation is still appropriate everywhere.
Where the job includes local damage rather than a complete covering, use the render repair guide to define the repair area and expected appearance. If the aim grows into a coordinated treatment across the house, the house rendering page helps combine the separate walls into one scope. Neither change should happen informally halfway through the job.
Common questions
Can render end in the middle of a flat wall?
It may be technically possible with an appropriate detail, but the line is likely to remain a visual feature. Discuss a natural break or a clearly designed division rather than assuming it will disappear.
Can an extension use a different colour?
Yes. Compare it with the retained materials and record where the different finish begins. Any required planning checks still relate to the actual property and proposal.
Will new render bridge a moving crack?
A finish should not be relied on to solve movement. The condition and the appropriate joint or repair need assessment before application.
What belongs in a single-wall quotation?
Include the full face, returns, preparation, openings, access, protection and edge details. A square-metre description alone is incomplete.
See housing and planning information for Beeston and nearby places, including the source and geography behind each figure.